Install Chimera Linux with Encrypted Root-on-ZFS

I use the Chimera Linux live install image to create an encrypted, console-only base configuration using the OpenZFS file system that can be customized further for various tasks.
This is how I do it...
1. Let's go!
1.1 Setup
- Target device is
x86_64architecture - UEFI boot with ZFSBootMenu as bootloader
- Chimera is the sole OS on a single disk (example: sda)
- Root ZFS file system with native encryption
- GPT partition table with 3 partitions:
- sda1 = Size:
1GB; Format:vfat; Use as:EFI boot partition - sda2 = Size:
<equal to RAM on target device>; Format:swap; Use as:encrypted swap - sda3 = Size:
->END; Format:zfs; Use as:encrypted ZFS pool
- sda1 = Size:
1.2 Download
The latest live ISO install images are available here: repo.chimera-linux.org
Download chimera-linux-x86_64-LIVE-<version>-base.iso and sha256sums.txt.
On a Linux-based system, verify the image:
$ sha256sum -c --ignore-missing sha256sums.txt
1.3 Prepare install media
Method 1: Ventoy
I now use Ventoy to setup a USB device to be a multiboot installer. Simply copy an iso to the device, reboot, and the auto-generated menu lists all the disk images available to boot. Read more
Method 2: dd
Write the installer to an unmounted USB storage device using the dd command as root.
BE VERY CAREFUL TO NOTE THE PROPER DEVICE. ALL DATA ON THE DEVICE WILL BE OVERWRITTEN.
Example: On a Linux system, if a USB stick appears as sdx1, then write the installer to sdx (no partition number):
$ sudo dd if=/path/to/chimera-linux-x86_64-LIVE-<version>-base.iso of=/dev/sdX bs=1M
$ sync
2. Configure live environment
2.1 Boot
Boot from the USB install media. Login and password is root:chimera.
Confirm EFI support:
# dmesg | grep -i efivars
[    0.301784] Registered efivars operations
2.2 Network
By default, wired (ethernet) interfaces are configured for auto-detection and use DHCP.
Display all detected network interfaces along with their IP and MAC addresses:
# ip addr
2.3 (Optional) Remote login to installer
I make this manual install process easier (cut-n-paste commands; lookup info online) by remotely logging into the installer via SSH from another computer.
Start the SSH server:
# dinitctl start sshd
Switch to the other computer and SSH into the target device as user and password anon:chimera:
$ ssh anon@<target_device_ip_address>
Switch to root:
$ doas -s
2.4 Install extra packages
# apk update && apk add --no-interactive gptfdisk parted
2.5 Source os-release
File /etc/os-release defines variables that describe the current operating system. Use the $ID variable to set the short name of the distribution in later commands:
# . /etc/os-release
# export ID
2.6 Generate hostid
Note: This value must be unique among your systems. Chimera by default will output a value of 00000000, therefore a custom value must be supplied to zgenhostid.
Use zgenhostid(8) to create /etc/hostid and store the host ID in it.
Record a custom hostid and overwrite the file if it exists:
# zgenhostid -f "0x$( date +%s | cut -c1-8 )"
3. Prepare DISK
3.1 Define DISK variables
Identify the disk where Chimera will be installed by listing block devices:
# lsblk -f
Set DISK variables for either a SATA or NVMe device:
SATA (example: sda)
# export DISK="/dev/sda"
# export BOOT_PART="1"
# export SWAP_PART="2"
# export POOL_PART="3"
# export BOOT_DEVICE="${DISK}${BOOT_PART}"
# export SWAP_DEVICE="${DISK}${SWAP_PART}"
# export POOL_DEVICE="${DISK}${POOL_PART}"
NVMe (example: nvme0n1)
# export DISK="/dev/nvme0n1"
# export BOOT_PART="1"
# export SWAP_PART="2"
# export POOL_PART="3"
# export BOOT_DEVICE="${DISK}p${BOOT_PART}"
# export SWAP_DEVICE="${DISK}p${SWAP_PART}"
# export POOL_DEVICE="${DISK}p${POOL_PART}"
3.2 Wipe DISK
Before creating the new partition layout, wipe the DISK:
# wipefs -a $DISK
# sgdisk --zap-all --clear $DISK
# partprobe $DISK && sgdisk -p $DISK
3.3 Partition DISK
List partition type codes:
# sgdisk --list-types
Create EFI boot partition:
# sgdisk -n "${BOOT_PART}:1m:+1g" -t "${BOOT_PART}:ef00" -c 0:esp $DISK
Create swap partition (example size: 16GB):
# sgdisk -n "${SWAP_PART}:0:+16g" -t "${SWAP_PART}:8200" -c 0:swap $DISK
Create zpool partition:
# sgdisk -n "${POOL_PART}:0:-10m" -t "${POOL_PART}:bf00" -c 0:pool $DISK
Display layout:
# partprobe $DISK && sgdisk -p $DISK
4. ZFS pool creation
4.1 Keyfile
Store pool passphrase in a keyfile:
# echo 'SomeKeyphrase' > /etc/zfs/zroot.key
# chmod 000 /etc/zfs/zroot.key
4.2 Define POOL_ID variable
When adding disks or partitions to ZFS pools, its important to use their symbolic links created in (on BIOS systems) /dev/disk/by-id or (available on UEFI systems) /dev/disk/by-partuuid. This will ensure that ZFS identifies the correct device even if disk naming should change at some point. Using traditional device nodes like /dev/sda3 may cause import failures.
I create variable POOL_ID to hold the PARTUUID of $POOL_DEVICE on my UEFI system:
# export POOL_ID=/dev/disk/by-partuuid/$( lsblk -o PATH,PARTUUID | grep $POOL_DEVICE | awk '{ print $NF }' )
4.3 Create pool
Create the encrypted ZFS pool with zpool-create(8):
# zpool create -f -m none \
  -o ashift=12 \
  -o autotrim=on \
  -o compatibility=openzfs-2.2-linux \
  -o feature@lz4_compress=enabled \
  -O acltype=posix \
  -O xattr=sa \
  -O compression=lz4 \
  -O encryption=aes-256-gcm \
  -O keyformat=passphrase \
  -O keylocation=file:///etc/zfs/zroot.key \
  -O relatime=on zroot $POOL_ID
Note: From the ZFSBootMenu Guide:
The option "-o compatibility=openzfs-x.x-linux" is a conservative choice. It can be omitted or otherwise adjusted to match your specific system needs... Future releases of ZFSBootMenu may therefore support newer feature sets.
4.4 Create file systems
# zfs create -o mountpoint=none zroot/ROOT
# zfs create -o mountpoint=/ -o canmount=noauto zroot/ROOT/${ID}
# zfs create -o mountpoint=/home zroot/home
# zpool set bootfs=zroot/ROOT/${ID} zroot
4.5 Export and re-import the pool
# zpool export zroot
# zpool import -N -R /mnt zroot
# zfs load-key -L prompt zroot
4.6 Temporary mount points
# zfs mount zroot/ROOT/${ID}
# zfs mount zroot/home
Verify:
# mount -t zfs
zroot/ROOT/chimera on /mnt type zfs (rw,relatime,xattr,posixacl,casesensitive)
zroot/home on /mnt/home type zfs (rw,relatime,xattr,posixacl,casesensitive)
Update device symlinks:
# udevadm trigger
5. Install Chimera
5.1 Bootstrap
# chimera-bootstrap /mnt
Copy files into the new install:
# cp /etc/hostid /mnt/etc/
# mkdir /mnt/etc/zfs
# cp /etc/zfs/zroot.key /mnt/etc/zfs/
5.2 Chroot into the new OS
# chimera-chroot /mnt
5.3 Set root password
# passwd
5.4 Update system
# apk add --no-interactive chimera-repo-contrib
# apk update
# apk upgrade --available
5.5 Install kernel and extra packages
# apk add --no-interactive linux-lts linux-lts-zfs-bin cryptsetup cryptsetup-scripts curl efibootmgr font-terminus
6. ZFS configuration
6.1 Configure initramfs-tools
# echo "UMASK=0077" > /etc/initramfs-tools/conf.d/umask.conf
Since the encryption key is stored in the /etc/zfs directory, it will automatically be copied into the initramfs.
Rebuild initramfs:
# update-initramfs -u -k all
6.2 Prepare EFI partition
Create a vfat filesystem on BOOT_DEVICE:
# mkfs.vfat -F32 $BOOT_DEVICE
Create an fstab entry for BOOT_DEVICE and mount:
# echo "PARTLABEL=esp   /boot/efi   vfat    defaults    0 0" >> /etc/fstab
# mkdir -p /boot/efi
# mount /boot/efi
6.3 Set ZFSBootMenu properties on datasets
Assign command-line arguments to be used when booting the kernel:
# zfs set org.zfsbootmenu:commandline="quiet" zroot/ROOT
Configure key caching in ZFSBootMenu:
# zfs set org.zfsbootmenu:keysource="zroot/ROOT/${ID}" zroot
6.4 Install ZFSBootMenu
Install a prebuilt ZFSBootMenu executable to the EFI system partition:
# mkdir -p /boot/efi/EFI/ZBM
# curl -o /boot/efi/EFI/ZBM/VMLINUZ.EFI -L https://get.zfsbootmenu.org/efi
# cp /boot/efi/EFI/ZBM/VMLINUZ.EFI /boot/efi/EFI/ZBM/VMLINUZ-BACKUP.EFI
6.5 Configure EFI boot entries
# efibootmgr -c -d "$DISK" -p "$BOOT_PART" -L "ZFSBootMenu (Backup)" -l '\EFI\ZBM\VMLINUZ-BACKUP.EFI'
# efibootmgr -c -d "$DISK" -p "$BOOT_PART" -L "ZFSBootMenu" -l '\EFI\ZBM\VMLINUZ.EFI'
7. Chimera configuration
7.1 Create user
Example user foo:
# useradd -m -G wheel foo
# passwd foo
7.2 Set hostname
Example name mychimera:
# echo mychimera > /etc/hostname
7.3 Set timezone
Example timezone Canada/Eastern:
# ln -sf /usr/share/zoneinfo/Canada/Eastern /etc/localtime
7.4 Console setup
Chimera uses the same console-setup(5) system as Debian.
Example: Use TerminusBold as the console font and increase font size by modifying /etc/default/console-setup:
ACTIVE_CONSOLES="/dev/tty[1-6]"

CHARMAP="UTF-8"

CODESET=Lat15
FONTFACE=TerminusBold
FONTSIZE=12x24
Activate the new settings in the current session by running setupcon.
7.5 Keyboard
Default keyboard is US Qwerty. See keyboard(5) for options.
Example: I like to use the Colemak keymap, which is available in /usr/share/keymaps/i386/colemak.
To temporarily change the keymap to colemak:
# loadkeys colemak/en-latin9
To set colemak as the system default, modify /etc/default/keyboard with:
KMAP=colemak/en-latin9

XKBMODEL=pc105
XKBLAYOUT=us
7.6 System logging
Default logging system on Chimera is syslog-ng.
Enable the service:
# dinitctl -o enable syslog-ng
Logs are written to /var/log/messages.
7.7 Networking
You can configure wired networks statically or dynamically with dhcpcd.
Enable the service:
# dinitctl -o enable dhcpcd
Default activity is for dhcpcd to configure all interfaces with DHCP. Changes are made in /etc/dhcpcd.conf. See dhcpcd.conf(5) for more details.
7.8 SSHD
Enable the service to allow remote logins:
# dinitctl -o enable sshd
7.9 Configure encrypted swap
Create /etc/crypttab:
# echo "swap PARTLABEL=swap /dev/urandom swap,offset=2048,cipher=aes-xts-plain64,size=512" > /etc/crypttab
This will map /dev/disk/by-partlabel/swap to /dev/mapper/swap as a swap partition that can be added in fstab like a normal swap.
Add swap entry to /etc/fstab:
# echo "/dev/mapper/swap none swap defaults 0 0" >> /etc/fstab
8. Finish up
8.1 Exit the chroot
# exit
# umount -l -n -R /mnt
8.2 Export the zpool and reboot
# zpool export zroot
# reboot
8.3 First boot
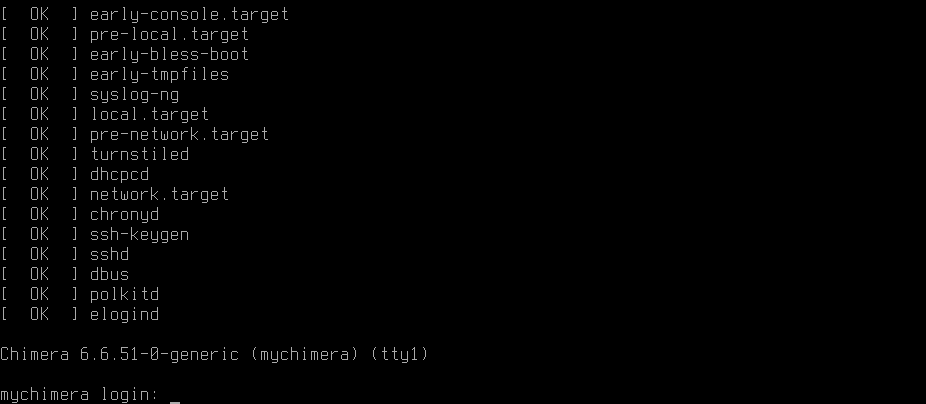
User is prompted for the passphrase to unlock the encrypted zpool. Upon success, boot resumes...

Welcome to Chimera!
9. Resources
- Detailed install guides to configure ZFS + ZFSBootMenu for various Linux distros: ZFSBootMenu Guides: Chimera Linux Edition
- Chimera documentation: Installation
- Encrypted root may pass sensitive information to an unencrypted swap partition that survives a system reboot: Encrypt a swap partition
You can like, share, or comment on this post on the Fediverse 💬
» Next: Install Debian Bookworm with Encrypted Root-on-ZFS
« Previous: Minimal Debian Bookworm